Regular cleaning and maintenance of your oven – rather than letting the grease bake on each time you use it – will save you a fair amount of time and elbow grease down the track.
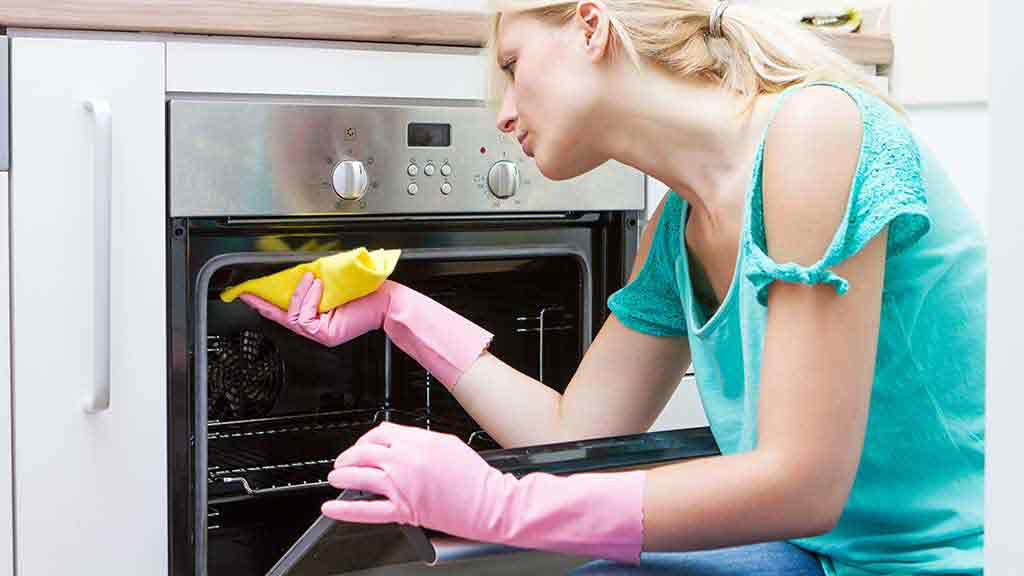
But even if you’ve been putting the task off for a while, these tips from our CHOICE kitchen lab experts Fiona Mair and Chantelle Dart will make cleaning your oven easier. Our testers have decades of experience with maintaining and cleaning ovens, and know which techniques will get your oven looking good as new.
When do you need to clean an oven?
You should be giving your oven surfaces a quick clean after every use while it’s still fairly warm, to avoid food baking on. Regular cleaning also reduces the need for using harsh, caustic solutions. At the very least, your oven should get a thorough clean every month (or more frequently, depending on how often you’re using it).
What do you need to clean an oven?
For general cleaning:
White vinegar
Bicarb (baking) soda
Soft cloth
Microfibre cloth
Washing-up liquid
For the racks:
Washing powder
Old dishwashing brush
Scourer pad or an old toothbrush/washing brush
For the glass door:
Hot water and a microfibre cloth
Glass cleaner
Glass scraper (if your model allows)
White vinegar, baking soda, a soft cloth, a microfibre cloth and washing-up liquid are ideal ingredients for cleaning your oven.
How do you know if your oven needs cleaning?
When the residue gives off a smoky smell, or when you’re finding that the oven doesn’t perform quite as well as it used to, it’s definitely time for a clean. The glass door may also become increasingly hard to see through and there could be crumbs accumulating in the door seal or hinges.
Cleaning your oven the natural way
You can give your oven’s interior a clean using bicarb (baking) soda and vinegar. The bicarb removes stains while the vinegar cuts through grease. You should keep the area well ventilated and preferably wear a mask.
Make a paste out of several heaped tablespoons of bicarb and a little water. You can spread this around the oven’s interior with a cloth, steering clear of any heating elements. Add more bicarb paste as necessary.
After a few hours (or even overnight), spray white vinegar on the bicarb residue to let it foam up.
With a damp microfibre cloth or sponge, wipe out the oven, making sure you remove all of the residue from cracks and crevices.
CHOICE tip: Some oven models let you drop down the grill element for easier cleaning of the oven ceiling. Don’t use baking soda on the glass oven door, as this could be abrasive.
Once your oven is clean, you can do regular top-up cleans after each use:
A regular wipe-down after each use will reduce the need for elbow grease or harsh chemicals.
While the oven is still warm, place a bowl of steamy, hot water onto one of the racks, and close the door for a few minutes.
Use a microfibre cloth or sponge to wipe away any resulting grease.
Your oven may actually have a ‘steam cleaning’ function to soften the grease and grime, which involves a similar process. Removing stubborn grease marks even after the steam cleaning cycle can be difficult and may still require an oven cleaning product or mixture for a thorough clean.
Should you use an oven cleaner?
Only use an oven cleaner as a last resort, as they can be dangerous – if you get them on your skin or in your eyes it can cause severe irritation, deep burns or even blindness. They need to be handled with care. If you must use an oven cleaner, follow our tips.
Keep the area well-ventilated so you or your family and/or pets don’t breathe in any fumes.
If the instructions say to wear safety glasses or a face mask, then do it (and if they don’t, do it anyway!)
Wear a long-sleeve top and gloves to prevent your skin from coming into contact with the cleaner.
If it’s a spray you’re using, leave the roof till last. If you spray the roof first, it’s likely to drip onto your arms when you’re tackling other areas.
Don’t go overboard with the amount of cleaner you’re using and make sure you give it time to work.
Consult your manual to find out how to remove the oven door for cleaning, as all ovens are different.
Modern ovens usually have a cool-to-touch glass pane on the exterior and an inner pane (or two). You may need to remove the door, and then the window panes, if grease and grime has made its way in between the panes.
Modern oven doors usually have two latches or levers that attach the door securely to the hinge, which will need to be unlocked. Instructions on how to remove the door will vary depending on the model, and whether it’s a built-in or freestanding oven. It’s best to check the manual or the manufacturer’s website for any how-to videos relating to your model as they do differ.
Make sure you’re wearing protective gloves during the process, and have a soft towel placed on a bench nearby for the oven door to sit on. You may need someone to help you.
How to remove your oven door
Generally, removing the door and glass panes involves the following.
Opening it fully, then unclipping both latches all the way (check the manual for the right procedure).
Closing the door so it’s only partly open and then pulling it off the oven. The process varies – some models may require you to pull toward you, while others require you to pull it up and off the hinges.
Place the door safely on a bench padded with soft towels.
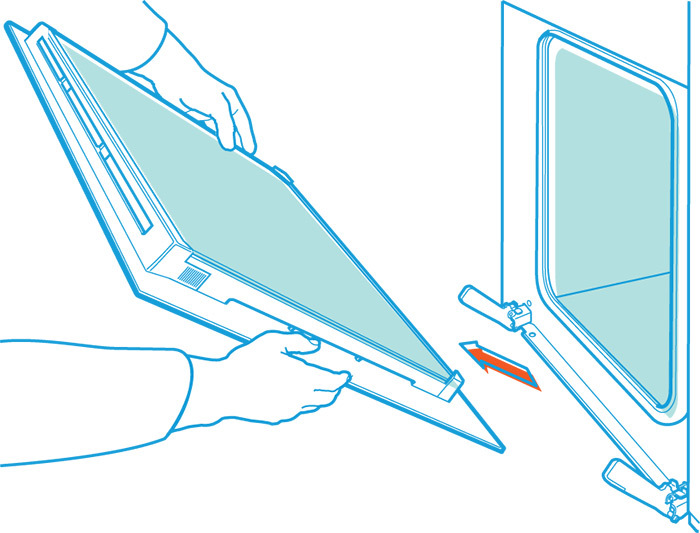
Carefully remove the glass panes for cleaning according to the instructions. Some models require no screws, while others require a Torx T20 screwdriver (star-shaped). Make sure you remember how the glass panes were positioned for easy re-assembling.
Cleaning your oven door
Cleaning the oven door may be as simple as hot water and detergent. Check your manual if a glass scraper is suitable on your oven.
Use the crevice tool of your vacuum cleaner to get loose crumbs out from around the door.
As for cleaning the oven glass, hot water and dishwashing detergent then wiping with a microfibre cloth could do the trick, otherwise you could try a glass cleaner. Baked on grease may require a glass scraper, but be sure to check your manual as some manufacturers don’t recommend this if there’s a coating on the glass.
How to clean oven racks
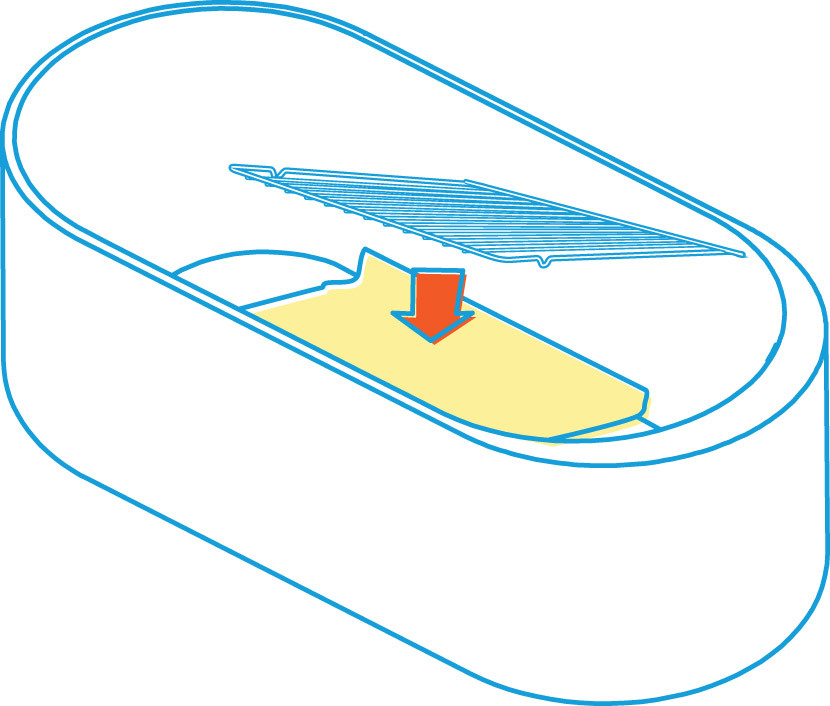
You can soak your oven racks in the bath.
Cleaning your oven racks is a necessity for most. Even if you’ve got a self-cleaning oven, you’ll usually still need to remove the racks as they can’t withstand the intense heat (some brands have pyrolytic-safe racks, but they’re in the minority).
In a bathtub or large sink, let shelves and runners (see an important tip about telescopic runners below) soak for no more than an hour in warm water with washing powder scattered across the surfaces. Ideally, look for one that’s enzyme-based as this will target the grease and grime. Make sure to use gloves doing this as some people are sensitive to enzyme-based powders. (If using a bathtub, place an old cloth or towel underneath so the rack doesn’t scratch the surface.)
Rubbing a sponge scourer along each runner should remove the baked on residue.
Rinse thoroughly and leave to dry. Make sure the racks are dried well, as they could rust. You can place them back into the oven at 100°C for 10 minutes to dry completely.
CHOICE tip: This method is unsuitable for telescopic runners, as the washing powder can be too harsh for the ball bearings and grease, warns CHOICE’s home economist Fiona Mair. The powder may dissolve the grease and loosen the parts. The telescopic runners can be removed either from the shelf supports or from the actual shelf – consult your manual to be sure.
Cleaning the exterior of your oven
Despite claims of ‘fingerprint resistant’ stainless steel, grease can still find its way onto your oven. And those sleek touchscreens can also become less responsive if they’re not kept clean.
For stainless steel ovens, clean small sections at a time to prevent streaking. You can also try these methods (but check the manufacturer’s instructions first).
Hot water and a microfibre cloth.
Vinegar and a paper towel.
Methylated spirits and a paper towel.
A citrus-based, all-purpose cleaner and microfibre cloth.
Many ovens have ‘self-cleaning’ functions (either pyrolytic or catalytic). A pyrolytic oven heats up to about 500°C for two to three hours, converting food residue into ash, which you wipe or vacuum away when it cools. The oven door automatically locks and is only released when the temperature falls to a safe level.
Pyrolytic cleaning in particular can be a hot and smoky process that takes some hours and requires good ventilation due to the release of chemicals including carbon monoxide, so it’s important to keep kids and pets out of the kitchen. Using this function also draws a lot of power so make sure that your home can handle it.
Pyrolytic cleaning in particular can be a hot and smoky process that takes some hours and requires good ventilation
Depending on the model, some accessories, such as racks and runners, may not be suitable for pyrolytic cleaning. And the inside of your oven door’s glass should be thoroughly cleaned before starting the pyrolytic function. You’ll also need to sweep or vacuum up the residual ash.
It may be better to manually clean your oven regularly rather than put it through a regular pyrolytic cycle. But if you’re still keen on using the pyrolytic function, check out our guide to self-cleaning ovens.
Catalytic liners work by absorbing fat splatters. It’s important that there’s good coverage of catalytic liners over the oven – both sides, back and roof is ideal.
To put the liners to action, you need to regularly heat the oven to 250°C for an hour to burn off any splatters. Once the oven is cool, wipe them with a damp cloth. These liners should last a long time, but you might eventually need to replace them at an additional cost.
Kim Gilmour is a Senior project officer. She manages a range of product tests such as coffee machines, stick vacuums, bassinets, high chairs and ovens, which are all tested in our in-house labs.
Kim’s work gives people access to robust, independent advice and helps consumers make informed decisions about their purchases. Her work also helps to keep manufacturers in check, by regularly exposing product flaws which can result in better and safer products.
Prior to CHOICE, Kim spent 16 years working as a technology journalist in Sydney and London. With several years as a senior researcher/writer at our UK sister organisation, Which?
Kim has authored how-to technology books such as Spotify for Dummies and Digital Photography for the Older and Wiser.
Kim has a Bachelor of Arts in Communication (Journalism) from Charles Sturt University. LinkedIn
For more than 60 years, CHOICE has been fighting the good fight for Australian consumers.
In the past year alone we've uncovered systemic issues with sunscreens, investigated shonky supermarket pricing, fought for stronger scam protections and helped make complex energy pricing fairer and clearer.
CHOICE is here to provide unbiased advice and independent testing in our world-class labs. We buy the products we test, just like you do, and our expert reviews are influence free. We’re here to help you choose smarter. Hopefully you’ll also save some money along the way.
Thanks to CHOICE, you’ll never be alone when a business treats you unfairly. You can support our work by joining or donating to our cause.