How to buy the best breadmaker
Baking fresh bread every day can be easy with the right equipment.
Last updated: 11 Dec 2023
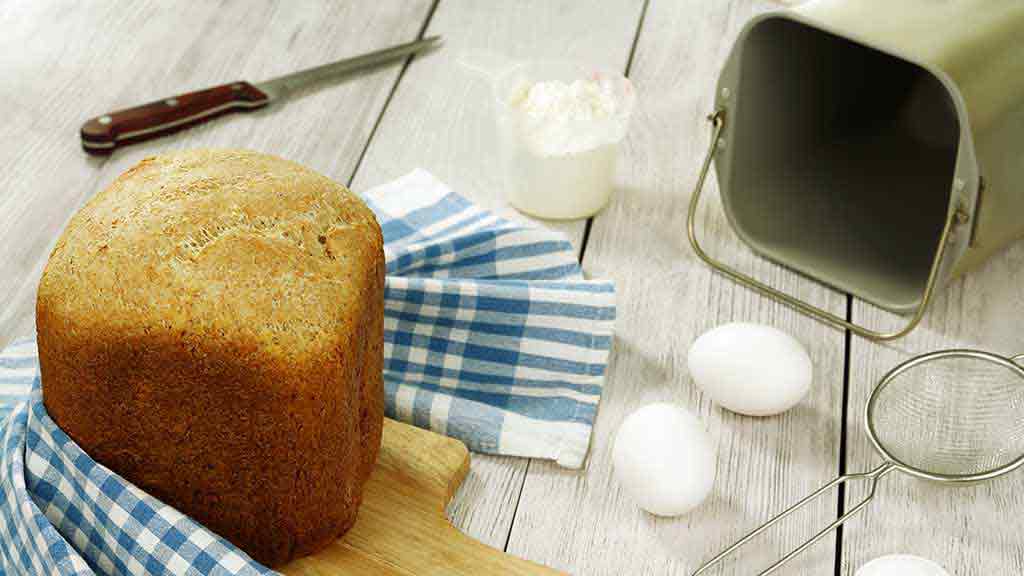
Making fresh bread doesn’t need to be difficult – supermarkets carry premix that you can pop straight into the breadmaker to knead and bake for you. If you’d prefer to make your own bread mix from scratch, you can do that too.
On this page:
Breadmakers can also make dough for bread rolls, pizza bases and focaccias, and can be used for cakes, damper and even homemade jam!
But it’s also important to avoid a dud model.
How much does it cost to make my own bread?
A 1kg multigrain loaf takes about three to five hours to bake and will cost just over $3.
A 1kg multigrain premix loaf takes between three and five hours to bake and costs about $2.60.
When you make bread from scratch you know exactly what’s going into your create. However, there’s a long list of ingredients that need to be weighed accurately. You need to use the best quality flour and make sure the ingredients are in date and store them well.
On the other hand, a premix contains all the dry ingredients and yeast sachets, leaving you with only water to add. There’s a variety available – rye, fruit loaf, sourdough, multigrain and pizza/focaccia doughs and they can be bought in portioned packs or in bulk quantities.
What else can a breadmaker do?
You’d be pleased to know a breadmaker can make a lot more than just bread. Most breadmakers have the following standard settings:
Basic white
For traditional white bread. Most breadmakers allow you to choose from three crust colours: light, medium or dark.
Rapid, quick or turbo
For bread in a hurry. This setting reduces the cooking time by approximately one hour. Breads made using this setting may be slightly undersized and denser due to the reduced rising time.
Wheat, whole-wheat or whole-grain
For a heavier bread. This setting allows for a longer rising time, which is needed for wheat or grain flours. It’s normal for whole-wheat breads to be slightly smaller and denser than a white loaf. All models have this feature.
Wheat rapid
For whole-wheat bread in a hurry. This setting reduces the cooking time for a whole-wheat loaf. The rising times are shorter, so bread made from a combination of white and whole-wheat flour rather than 100% whole-wheat would produce a better result.
Sweet
For breads that require additional ingredients such as dried fruit, nuts, and chocolate. A timer beeps during the second kneading, so you can add the ingredients manually.
French or Continental
For a crispier crust. This setting reduces the amount of kneading time and increases the rising time. The result is a crispy crust, à la French and Italian breads. It’s also best for recipes low in fat and sugar.
Cake or batter breads
For cakes and non-yeast breads such as banana bread or yeast-free loaves.
Jam
For jams and preserves made from fresh fruit – resulting in less mess than the old stovetop method.
Bake only
For baking without kneading or rising first. This setting is the equivalent to baking in a conventional oven and can be used to bake frozen or pre-prepared dough.
Gluten free
For specialty diet breads. The recipes used for this setting will substitute wheat flour with other types of flours such as rice flour, soy flour and chickpea flour.
Damper or yeast free
For muffin-style or damper breads. The recipes used for this setting rely on baking powder or bicarbonate of soda as the raising agent. This will result in a heavier texture and a loaf that’s not as highly risen as yeast breads.
Pasta
For homemade pasta. This setting prepares the dough for pasta, which can then be used in a pasta machine or rolled out and shaped by hand.
Dough
For preparing dough to bake in an oven. The dough setting will perform the mixing/kneading/punch down and first rise automatically. You can then shape the dough into rolls, plaits, bagels or whatever you like, allow to rise a second time, then bake in a conventional oven.
Pizza dough
For homemade pizza bases and focaccia. This setting mixes the dough for flatbreads such as pizza bases and focaccias. The dough is ready to roll out and no rising is required – just add the topping and bake in a conventional oven.
What if there’s no setting for the bread I want?
Even if you have allergies or you want to bake a specialty bread, it’s easy to get creative with recipes. Breadmakers can handle many types of ingredients, and even if there isn’t a specific program for the type of bread you want to bake, that doesn’t mean it’s off the menu – check the appliance’s recipe book to see if it offers an alternative baking mode for your favourite bread.
What features should I look for?
Loaf size and shape
Do you prefer a horizontal or vertical loaf? Smaller loaves are easier to slice, while larger taller loaves can be trickier to slice as the top of the loaf has a softer crust. The number of slices will vary, but generally you can expect eight slices from a 500g loaf, 12 slices from 750g and 16 slices from a 1kg loaf.
Loaf colour options / crust control
This feature lets you select your desired crust colour. Most breadmakers have a choice of light, medium or dark. Some functions are pre-programmed with a crust colour; “sweet”, for example, would be limited to a light-medium setting as the increased sugar content can produce a dark crust.
Delay start
This is great if you want your bread to be finished when you wake up or get home from work, but is only suitable for basic breads that don’t contain perishable ingredients such as cheese or eggs.
Automatic fruit and nut dispenser
This automatically adds ingredients such as fruit, nuts and herbs for you at the right time. Some models beep to let you know they’re being added.
Progress indicator
This shows the stage of the bread-making process in the electronic display window.
Removable lid
This makes cleaning easier.
Viewing window
A viewing window lets you see the bread and so reduces the temptation to open the lid, which can cause heat loss and produce a poor loaf. The window will fog up during some of the processes.
Power failure protection
This is a memory device that saves your bread if the power is interrupted, such as the plug accidentally being removed or a black-out. Some machines give you just a few minutes to restore power, while others give up to one hour, after which the cycle will continue where it left off. If the power goes off during the baking cycle, it’s best to remove the bread tin and continue baking in the oven.
User-programmable settings
This lets the user program their own personal recipe cycle times and baking temperature.
Manual stop/pause function
Lets the user be more creative with their bread-making. The “pause” button can be activated at any time for up to 10 minutes before the program will continue. Activating the pause at the second rise, for example, lets you remove the dough and form it into a braid, pull-apart or filled bread, and then place it back into the breadmaker for the final stages.
Cost
From $100 to $489, or check secondhand shops and websites – breadmakers are one of the most often discarded kitchen appliances.
Rebecca Ciaramidaro is a Content producer in the Household team at CHOICE. Rebecca writes about a wide range of children's and household products, ranging from cots and strollers to ovens, BBQs, espresso machines and electric blankets. And also grocery items such as nappies, sanitary pads and laundry detergents.
Previously at CHOICE, Rebecca worked as a Test officer in the kitchen lab.
Rebecca has a Bachelor of Science (Nutrition and Food) from the University of Western Sydney. LinkedIn
Fiona Mair tests and compares appliances in the CHOICE kitchen lab, from ovens, cooktops, BBQ's and air fryers, to espresso machines, blenders, food processors, microwaves, frypans and more. Fiona is also involved in Test Research, to help manufacturers with their product development for kitchen appliances. Fiona also conducts and judges food taste tests and is a judge for Sydney Royal Fine Food Show. She develops consumer-focused recipes and technical methods for testing kitchen appliances.
Fiona has a degree in home economics and dietary supervision. Fiona has been at CHOICE since 1997 and previously worked as a dietary supervisor at a children's hospital.
Fiona wants to help people to save time and money in the kitchen, reduce waste and landfill and to enjoy eating foods they've prepared from scratch.
You can find me on LinkedIn.