A dishwasher is a great labour-saving device that not only makes cleaning up in the kitchen a breeze, but is also a very water- and energy-efficient way to do the dishes.
And the good news is, installing one is a pretty simple job – especially if you’re replacing an existing one (working or not). That said, as with installing any appliance, there are a few things you should keep in mind to make sure it all goes smoothly, especially for a new installation where there are several rules you need to follow.
Replacing an existing dishwasher
Provided you’ve measured up correctly and your new dishwasher fits in the space under your bench, replacing an old dishwasher is relatively straightforward. All the infrastructure you need – power, water, drainage and space – are already in place.
It’s largely a matter of taking the old one out, connecting the new one to the drain and inlet tap, then plugging it in, and your new appliance is good to go.
What you’ll need
A screwdriver and/or a driver drill.
A dropsheet or cardboard (optional).
Tape (optional).
A mop and bucket to clean up any spills.
The mounting hardware, inlet and outlet hoses that came with your dishwasher.
If it still works, consider turning the water off and running the old dishwasher for about 30 seconds to pump out any residual water in the bottom of it first – this helps minimise messy spills when you’re removing it.
Turn off the water and disconnect the power, water inlet and drain hoses under the kitchen sink.
Lay a drop sheet or some cardboard down to protect your floors, and be prepared to mop up any spills from the now disconnected piping.
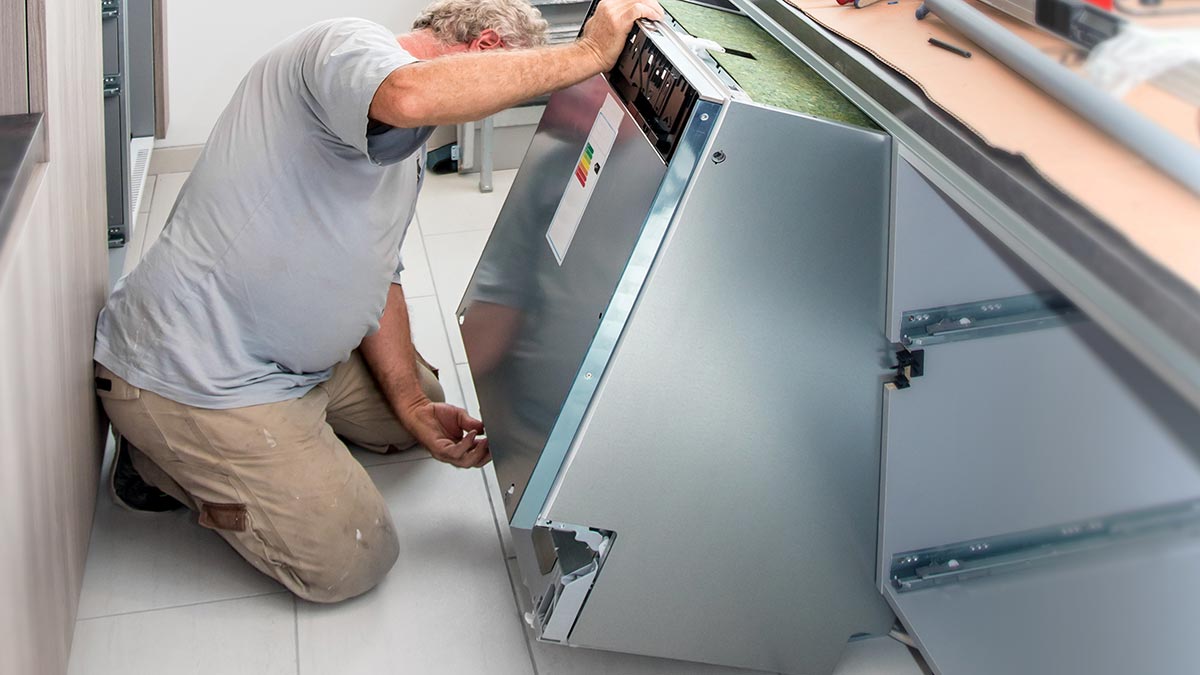
Remove any screws or bolts securing the dishwasher to your countertop or cabinetry and gently slide the unit out onto the drop sheet or cardboard then move it out of the way to make space for the new one.
Look inside the cabinetry for damage, and clean the floor under the old dishwasher. Either repair water damage before installing your new dishwasher, or make a note to come back and fix it later.
Unpack the new dishwasher and keep the cardboard to protect the floor as you wrangle it into place.
Check the new machine’s manual for any specific instructions or tips for installation.
Measure the height of the opening in your cabinetry, and if your new dishwasher is a freestanding model, remove the worktop if necessary so it will fit.
Adjust the feet on your dishwasher so it’s stable and level. You may need to adjust it again once it’s in place, but getting it close now is easier than when it’s under your counter.
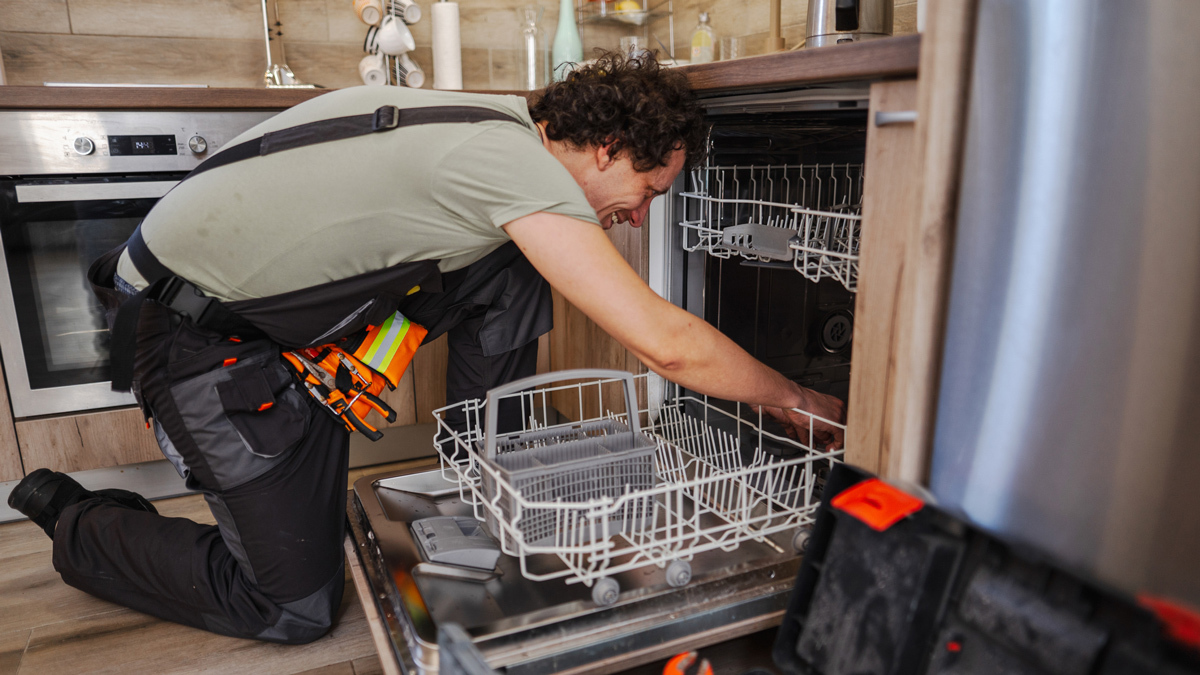
Feed the power, water and drainage lines through the hole in your cabinetry and connect them up under the sink.
When connecting the waste water hose, make sure it’s looped up and over in an arch – use the handy U-bend that’s supplied with the dishwasher for this purpose. Leave the end of the hose as high as possible in the drain pipe – if you don’t, you might create a syphon effect in your drainage, which could potentially damage your appliance – then clamp the hose down.
Move your new dishwasher into the space in your cabinetry. Feed cables and hoses through the cabinetry as you go to avoid crushing or kinking them as your dishwasher slides into place. (Alternatively, before sliding it into place, you can secure everything to the floor with tape, along the centreline of the dishwasher so it won’t tangle in the dishwasher’s feet).
Once the dishwasher’s in place, readjust its feet to make sure it’s level and stable – this shouldn’t take much because you pre-adjusted them earlier.
Turn everything on and give it a test run to make sure it’s all connected and working properly, keeping an eye out for any leaks.
Securely anchor your dishwasher to the cabinetry. Dishwashers are very stable and contained when closed, but if not properly secured, they can tip forward when you slide the drawer out to empty it, showering you (or your children) with crockery. While every dishwasher is different, this is generally just a matter of driving a couple of screws in, so there’s no reason to neglect it.
If you’re installing a dishwasher where there wasn’t one before, you’ll need a licensed plumber to handle the drain and water supply.
Installing a new dishwasher for the first time
If your kitchen doesn’t already have the necessary fittings for a dishwasher, you’ll need a licensed electrician to install the power point and a licensed plumber for the drain and water supply.
This isn’t just for peace of mind, it’s because legally only licensed tradespeople can touch your home’s wiring, sewer or water pipes. Do the work yourself and you could cop a nasty fine, and your insurance company could deny any future claims if there’s a problem down the track.
Because dishwashers use both water and electricity, the risk of a catastrophic outcome should something go wrong is much higher than for most other appliances.
What you’ll need
A screwdriver and/or a driver drill.
A dropsheet or cardboard (optional).
Tape (optional).
A mop and bucket to clean up any spills.
The mounting hardware, inlet and outlet hoses that came with your dishwasher.
A drill, hole saw or other means of making a 100 x 150mm hole in the side of your cabinetry.
A prybar or similar for removing cabinetry.
Sealant for protecting your benchtops from steam and water damage.
A brush or roller to apply the sealant.
A new tap connection (your plumber can supply this).
A new drain connection with an attachment for the dishwasher drain hose (your plumber can supply this).
A new power outlet with the right cabling (your electrician can supply this).
Getting started
Decide where the dishwasher is going to go – which will be one of the cabinet spaces on either side of your kitchen sink, as this is where you’ll access water and drainage.
Separating power points and water pipes
Under the Building Code of Australia, power points and water pipes can’t be installed in the same cabinet void as your dishwasher – instead, your drainage, power and water supplies must be installed in the next cabinet along, with hoses and cables passing through a small hole (about 100 x 150mm) to the appliance.
Ever wondered why your dishwasher’s plug is under the sink, not behind the appliance? It’s to reduce the risk of electrocution if it springs a leak.
Read more:
Other important things to think about when installing a dishwasher
If you’re retrofitting a dishwasher to an existing kitchen, you’ll need to remove the cabinet unit where your dishwasher is going to go. You may be able to do this yourself, but it’s probably worth hiring a professional, in case you damage other parts of your kitchen in the process.
Next, you need to consider your counters. Steam and water spillage from your dishwasher can damage laminated benchtops, so it’s important to make sure the undersides of benches are sealed to minimise the risk of water damage.
Finally, most dishwashers (particularly built-under models) are heavy, unwieldy appliances with lots of sharp edges, so practise safe handling procedures and wear sturdy gloves to protect your hands. Ideally, have a friend or family member help you when carrying it into the kitchen.
Tip for dish-drawer-style dishwashers
If you’re installing a dish-drawer-style dishwasher, such as those from Fisher & Paykel, then you may need to remove the drawer from the chassis before sliding it into place.
This can make the installation a little tricky, as you’ll need to feed the cable and hoses, which are connected to the drawer, through the chassis to their destinations.
So you’ll need the drawer to be close enough that they’ll reach, but far enough away that you have room to install the chassis.
For more than 60 years, CHOICE has been fighting the good fight for Australian consumers.
In the past year alone we've uncovered systemic issues with sunscreens, investigated shonky supermarket pricing, fought for stronger scam protections and helped make complex energy pricing fairer and clearer.
CHOICE is here to provide unbiased advice and independent testing in our world-class labs. We buy the products we test, just like you do, and our expert reviews are influence free. We’re here to help you choose smarter. Hopefully you’ll also save some money along the way.
Thanks to CHOICE, you’ll never be alone when a business treats you unfairly. You can support our work by joining or donating to our cause.