You can stop all requests or only requests from certain websites
You can choose to receive prompts from specific sites such as calendar or organisation services
Sick of websites asking permission to notify you of some such thing or another? You can disable these notification requests, either across the board or from certain websites only.
The method is similar in most browsers, as the majority are all based on Google’s Chromium architecture. For this reason, we’ll focus on the two biggest Chromium browsers: Google Chrome and Microsoft Edge.
Mozilla’s Firefox browser is the only major contender to differ from the pack (Apple Safari notwithstanding, thanks to its surprisingly small user base).
Google Chrome
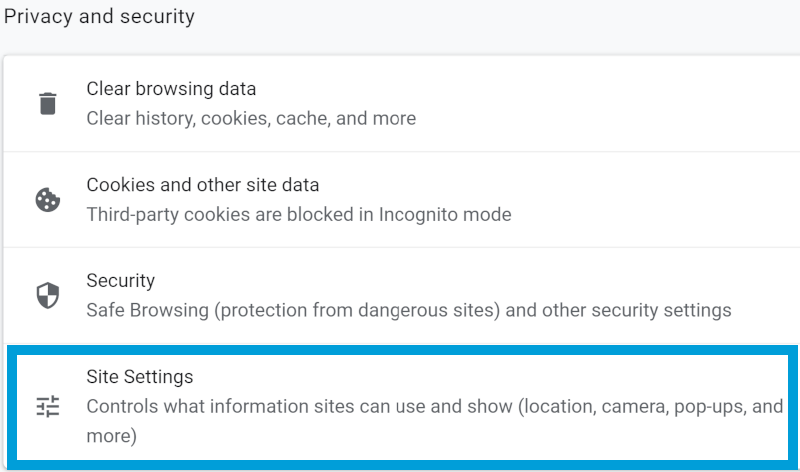
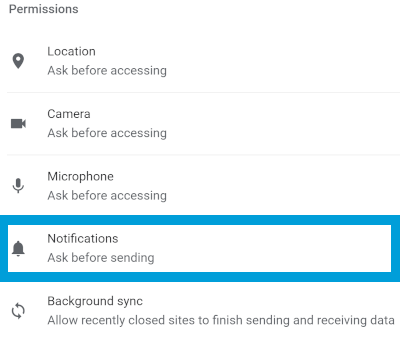
In Chrome, click the three vertical dots in the top right of the window, then click Settings. Scroll down to “Privacy and security” and click on Site Settings. Scroll down to “Permissions” and select Notifications. At the top of the page, there are two toggles:
Sites can ask to send notifications.
Use quieter messaging (blocks notification prompts from interrupting you).
Turning off the first option blocks any website from prompting you to allow notifications, ever.
Keep in mind this includes websites such as Google Calendar, Evernote and other organisational tools. So you’ll need to set these websites individually to allow notifications via Chrome settings if you want them.
The second option isn’t visible if the first is turned off. It still allows initial requests for notifications, but will eventually block them if you ignore multiple requests from the same site. It will also block requests from sites whose users typically don’t allow notifications.
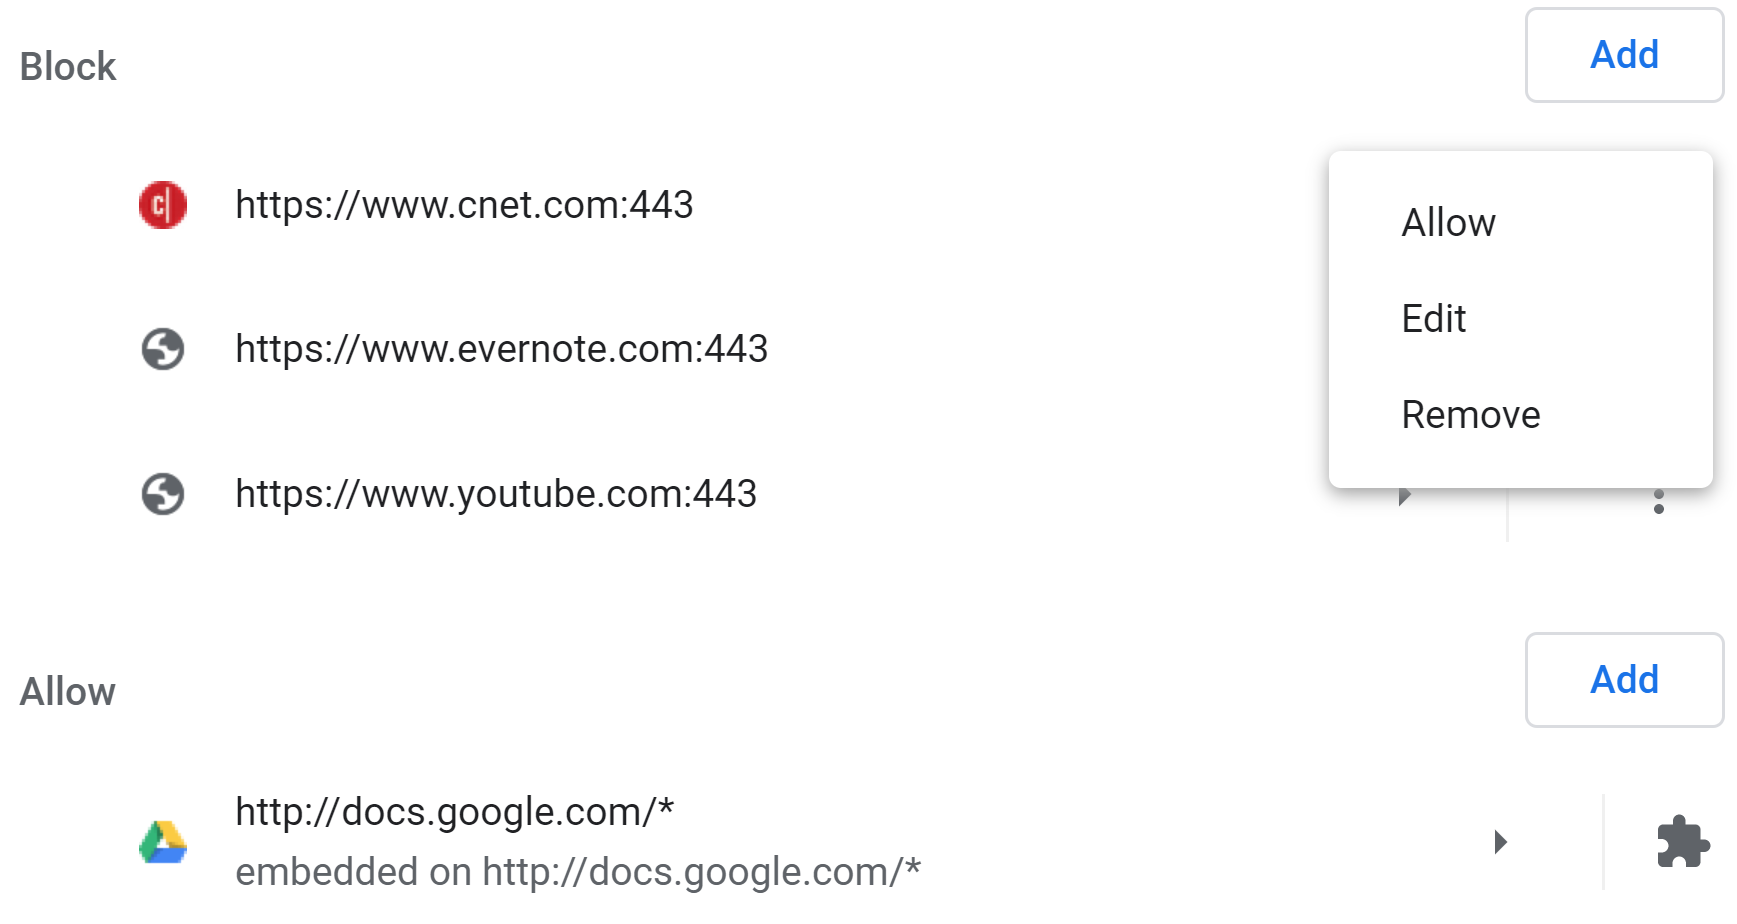
You can also allow or block individual sites from this page. Scroll down the page and websites are separated into two categories: Block and Allow.
In either section, click the Add and enter a website in the pop-up field, then click Add again. To edit the status of a blocked or allowed website, click the three vertical dots to the right of it.
Allow – for blocked sites, click Allow to move it to the Allow category.
Block – for allowed sites, click Block to move it to the Block category.
Edit – edit the URL of the website.
Remove – removed websites won’t have a blocked or allowed status.
If there is a different icon to the right of an allowed or blocked website (i.e. no three vertical dots), it might be allowed or blocked by a browser extension. You will need to edit this status through the extension’s settings or by removing the extension.
You won’t get notifications after you ignore multiple notifications from a site, or if other users typically don’t allow notifications from a site.
Click on the three horizontal dots in the top right of the window and select Settings.
In the top left of the new screens, click on the three horizontal lines, then select Cookies and site permissions.
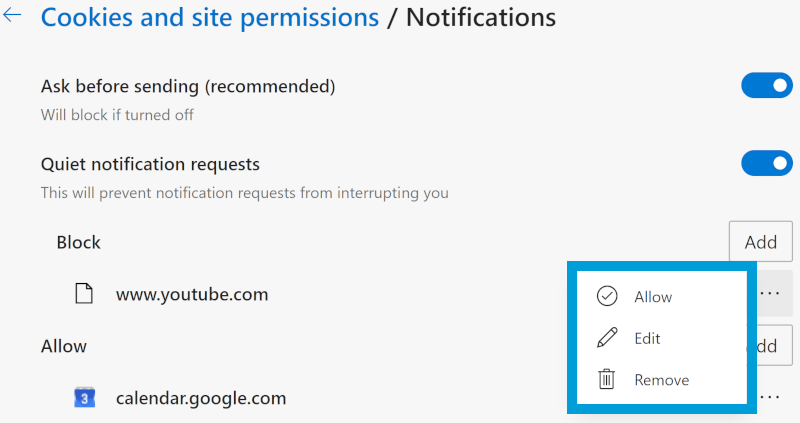
Click Notifications and, at the top of the page, click the toggle next to Ask before sending (optional).
This will enable or disable websites’ ability to ask permission to send notifications.
You can also block or allow individual websites.
In the Block or Allow sections, click Add and enter a web address, then click Add again.
To edit a website’s permissions, click the three horizontal dots to the right of it and select one of the following:
Allow – for blocked sites, click Allow to move it to the Allow category.
Block – for allowed sites, click Block to move it to the Block category.
Edit – edit the URL of the website.
Remove – removed websites will have neither a blocked nor allowed status.
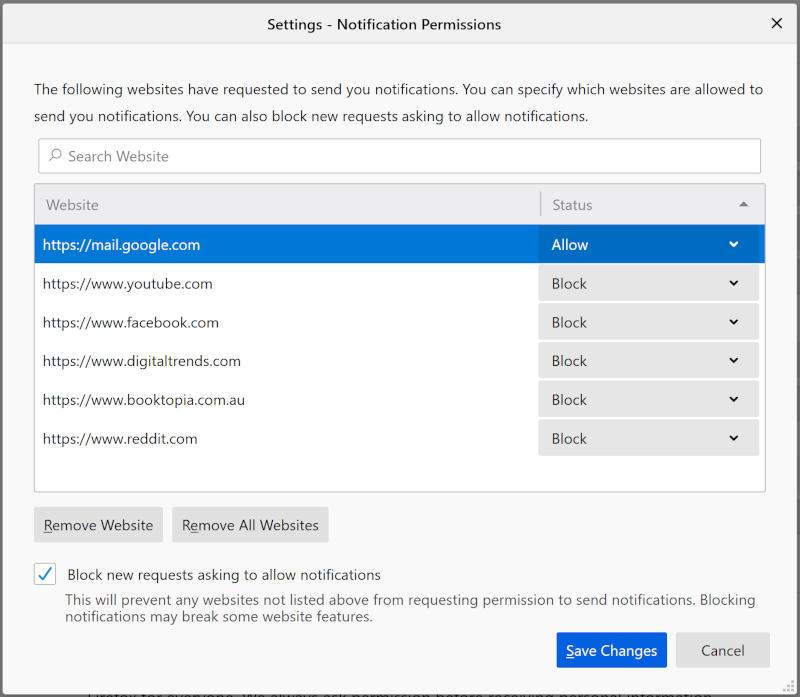
Mozilla Firefox
Click the three horizontal lines in the top right of the window, then select Options.
In the new screen, click the padlock icon to the left (labelled “Privacy & Security” when moused over) and scroll down to the Permissions section.
To the right of “Notifications”, click Settings…
To disable all notification requests, tick Block new requests asking to allow notifications at the bottom of the pop-up window and then Save Changes.
You can also allow or block notifications from individual websites. To add new websites to the blocked or allowed list, type their URL in the search field toward the top of the pop-up window.
You can switch a website’s status between blocked and allowed using the drop-down to the right of its URL. Or you can remove it from the list altogether by single-clicking on the URL and then clicking Remove Website. Don’t forget to click Save Changes on your way out.
For more than 60 years, CHOICE has been fighting the good fight for Australian consumers.
In the past year alone we've uncovered systemic issues with sunscreens, investigated shonky supermarket pricing, fought for stronger scam protections and helped make complex energy pricing fairer and clearer.
CHOICE is here to provide unbiased advice and independent testing in our world-class labs. We buy the products we test, just like you do, and our expert reviews are influence free. We’re here to help you choose smarter. Hopefully you’ll also save some money along the way.
Thanks to CHOICE, you’ll never be alone when a business treats you unfairly. You can support our work by joining or donating to our cause.