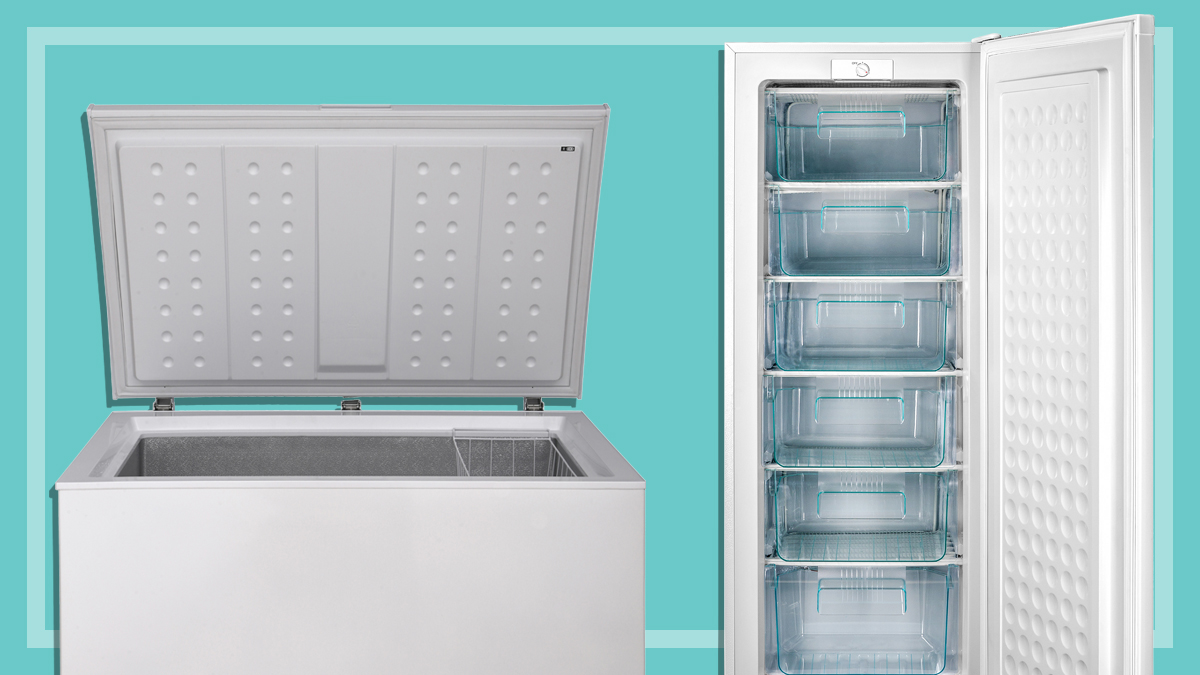
Thankfully defrosting your fridge and freezer is a chore largely confined to the annals of history, because with one or two notable exceptions, modern fridges are all frost free. But if you happen to have a chest freezer, you’ll need to periodically pull everything out of it to deal with the icy build-up that’s slowly robbing you of valuable storage space.
We outline the steps you need to take to deal with an overly frosty freezer without spoiling your food and making a mess in your kitchen.
Why is my freezer frosting up?
If humid air from your kitchen finds its way into the freezer, the moisture can stick to the freezer’s walls and contents and form frost. This happens whenever you open your freezer, but more insidiously if your freezer isn’t sealing properly when you shut the door.
Make sure the seals are clean and free from obstructions, and that they’re in good condition, and wipe up any grime or food particles with a soft, damp cloth. Frost-causing moisture can also come from your food if it hasn’t been properly wrapped, which can cause freezer burn.
Modern freezers have defrost heaters in them, which periodically warm the walls of the freezer to melt any frost that’s forming. But if your door seals aren’t sealing properly, or if you’ve got an old-school non-frost-free fridge or chest freezer, you may still find a frosty build-up to deal with.
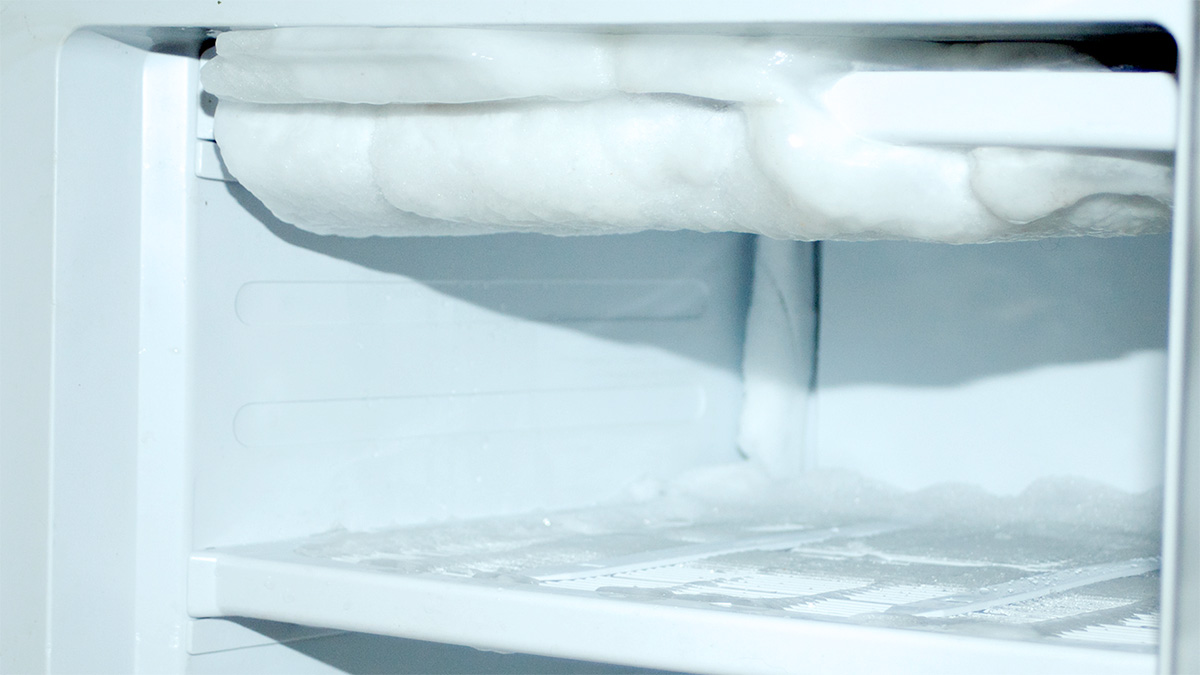
Frost isn’t harmful in and of itself, but if allowed to build up over time, it can leave you with precious little space for food, and more concerningly, frost build-up can obstruct vents and sensors, playing havoc with your freezer’s operation, potentially driving up running costs and reducing its effectiveness.
When should I defrost my freezer?
Cleaning and maintaining your freezer is essential to get the most out of it. If your frost-free upright freezer is working well, it shouldn’t ever need defrosting, but if it’s not, or if you’ve got a chest freezer, then you need to take action once the frost has reached half a centimetre thick.
While it might seem that a sweltering summer’s day will speed the defrost process along, aim to defrost your freezer on a cold day, not a warm one. It will make it much easier to keep your food at a safely chilled temperature while you do it.
When it comes to storing your food, it’s a good idea to start running down your supplies in the lead-up to defrost day. If you have access to another fridge at home, in the office, or at a friend or neighbour’s place, then storing your food there is your next best option.
Failing that, you can use a cooler, or even a big plastic tub – intersperse layers of food and ice when loading it to maintain even temperatures. Because ice melts, ensure your food is well wrapped so it won’t get soggy and waterlogged.
What things do I need to defrost my freezer?
The difference between things going smoothly and disaster befalling your kitchen is preparation, so gather the things you’ll need before you start.
Something to keep your food cold – another freezer is ideal, but it could be a cooler and a bag of ice, or anything capable of keeping your food frozen for the duration of the process.
Old towels – to catch any spills and dry everything after the ice has melted.
A plastic drop sheet – to catch any spills that the towels miss.
A receptacle for meltwater – such as a low-sided baking tray, bowl or bucket to catch the runoff from melting ice.
A hose or tube – to direct the meltwater if your freezer has a drain plug.
Once you’ve safely stored your food it’s time to get started. Unplug your freezer (you can do this before taking the food out if you prefer, which means the door alarm won’t annoy you but you also won’t have the benefit of the freezer light to see what you’re doing, and you’ll need to work fast).
If you’re dealing with a small chest freezer, or one that’s readily mobile, then take it outside to avoid leaving a mess in the house.
If you can’t move your freezer outside, then put plastic drop sheets and towels on the floor in front of your freezer, and towels on the lower shelves to help absorb moisture.
Now just leave the door open and wait for the ice to melt. This is the simplest way to defrost your freezer, but it’s also the slowest.
To speed up the process, place a bowl or container of hot water inside the freezer. The steam and heat will melt the frost much faster, but be careful not to use anything too hot – you can potentially damage the inner surfaces if you’re using a scalding hot pan. Put it on a pot rest to be safe, or better yet, more towels, which will help mop up the water.
If you don’t like the bowl of hot water approach, you can use a pedestal fan to blow room temperature air into your freezer, expediting the thaw, though it’s best not to combine the two methods – the fan will blow the extra heat energy away so they’ll cancel each other out.
Also remember that water and electricity don’t mix, so if you’re using your pedestal fan, be mindful of where the cord goes. You should never use a hair dryer for this reason either.
Defrosting your freezer might take as little as an hour, but you should allow half a day
If you’re in a real hurry, you can also take a more extreme approach and spray the ice down with a spray bottle of methylated spirits or denatured alcohol – this will rapidly soften the ice, expediting its removal.
Depending on your approach and the size of your freezer (as well as how much ice you have built up), defrosting your freezer might take as little as an hour, but you should allow half a day. Be sure to keep regular tabs on progress, mopping up water as the ice melts, and even removing large chunks of ice to the sink as it softens and separates from the cavity.
You can use a plastic spatula to encourage the ice away from the walls, but be gentle, and definitely don’t use anything sharp or metal – the last thing you want to do is put a hole in the soft plastic lining of your freezer.
Once the ice has fully melted, you have a once in a lifetime (OK, once a year) opportunity to give your now empty freezer a thorough clean. Mop up any residual moisture, then give the walls, shelves and door bins a good scrub with bicarbonate of soda and hot water, wipe up the residue with a damp cloth and make sure your freezer’s thoroughly dry.
Congratulations! You’ve now successfully defrosted your freezer and can turn it on again. You may be tempted to put your food back in it straight away, but provided your cooler is still cool enough, leave it where it is until the freezer pulls down to operating temperature. It may be several hours before it’s at a safe food storage temperature again.
In the bad old days, periodically defrosting your freezer was just part and parcel of owning one. That was until the advent of frost-free technology, arguably the greatest advance in domestic refrigeration since the advent of the freezer itself. Frost-free freezers freed us all from arguably the most inconvenient aspect of owning a freezer, virtually overnight.
So what makes a frost-free freezer frost free? Something you wouldn’t expect to find in a freezer – a heater. At predefined intervals this heater kicks in to warm the walls of your freezer compartment for a short period, melting any frost that may be forming (this is called the defrost cycle).
The temperature rise is only slight, and it’s brief enough to not affect the food stored within. We can see this in the lab because we’ll notice a spike in energy consumption, but other than the absence of frost in your freezer, you’ll never notice it at home.
These days, pretty much every upright freezer will have a defrost heater, but unfortunately chest freezers still don’t. The omission of a defrost cycle in a chest freezer helps keep temperatures as even and stable as possible, which is really important for long-term food storage.
Also because of their design, chest freezers tend not to build up much frost anyway – the top opening door and the fact that cold air is denser and sinks means very little humid room temperature air will enter your freezer when you open it.
For more than 60 years, CHOICE has been fighting the good fight for Australian consumers.
In the past year alone we've uncovered systemic issues with sunscreens, investigated shonky supermarket pricing, fought for stronger scam protections and helped make complex energy pricing fairer and clearer.
CHOICE is here to provide unbiased advice and independent testing in our world-class labs. We buy the products we test, just like you do, and our expert reviews are influence free. We’re here to help you choose smarter. Hopefully you’ll also save some money along the way.
Thanks to CHOICE, you’ll never be alone when a business treats you unfairly. You can support our work by joining or donating to our cause.